Ransomware Attacks: Prevention, Detection, and Recovery Guide

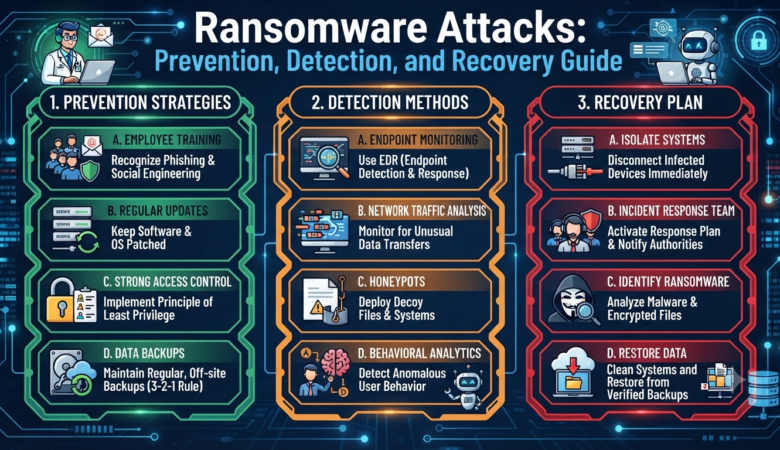
Ransomware Attacks: Prevention, Detection, and Recovery Guide   In the digital age, ransomware has become one of the most alarming and destructive threats in the cybersecurity landscape. From large corporations and hospitals to small businesses and individuals, no one is immune. The damage caused by ransomware can be financially devastating and emotionally exhausting—locking away vital data, paralyzing operations, and demanding a hefty ransom for a decryption key. But the news isn’t all bad. With understanding, preparation, and the right strategies, you can drastically reduce your risk and respond effectively if you ever find yourself a target. This guide will walk you through how ransomware works, how to prevent it, ways to detect an attack early, and what to do if you get hit. What is Ransomware? Ransomware is a type of malicious software (malware) that encrypts files or locks you out of your device, holding your data hostage until you pay a ransom—often in cryptocurrency like Bitcoin. The attacker promises a decryption key or unlock code after payment, but there’s no guarantee they’ll deliver. How Ransomware Spreads Phishing emails: Malicious attachments or links that install ransomware when clicked. Malvertising: Infected ads on legitimate websites. Drive-by downloads: Visiting compromised webpages can trigger automatic downloads. Remote Desktop Protocol (RDP) attacks: Weak or exposed remote access can be exploited. Software vulnerabilities: Outdated apps, plugins, or operating systems with known security flaws. Real-World Impact Ransomware has crippled city governments, health systems, law firms, and countless small businesses. In 2023, global ransomware damages were estimated at over $20 billion—a figure that continues to grow. The Ransomware Lifecycle: How Attacks Unfold Initial Entry: The attacker finds a way in—often via phishing, weak passwords, or unpatched software. Establishing Foothold: Malware is quietly installed, sometimes lying dormant while spreading laterally across the network. Payload Deployment: The ransomware encrypts files, locks screens, or both. Victims see a ransom note with payment instructions. Payment Demand: Attackers threaten to permanently delete data, leak sensitive files, or increase the ransom if demands aren’t met quickly. Aftermath: Even if you pay, there’s no guarantee of recovery. Data could be lost, stolen, or compromised. Section 1: Prevention—How to Stop Ransomware Before It Starts 1. Secure Your Email Gateways Since most ransomware arrives via phishing emails, robust email security is critical. Use advanced spam filters to block suspicious messages and attachments. Train employees to recognize phishing, including urgent, unexpected, or poorly written emails. Disable automatic downloads of attachments in email clients. Consider sandboxing email attachments—testing them in a safe environment before opening. 2. Update and Patch Everything Attackers thrive on outdated software. Enable automatic updates for your operating system, browsers, and all applications. Regularly patch hardware devices, like routers and firewalls. Remove software you no longer use, as it may not receive security patches. 3. Restrict User Privileges Limit what users can install, run, and access. Give users the lowest level of access needed for their tasks (principle of least privilege). Use separate accounts for administrative tasks and everyday use. Disable unnecessary services like RDP (Remote Desktop Protocol) unless absolutely required, and secure it with strong passwords and two-factor authentication. 4. Use Strong Authentication Implement multi-factor authentication (MFA/2FA) for all remote and administrative access. Enforce strong, unique passwords, and use a password manager to avoid reusing credentials. 5. Segment Your Network Don’t let ransomware spread unchecked. Set up network segmentation—separate sensitive systems from standard user devices. Limit communication between different parts of your network. 6. Regularly Back Up Data Back up all critical data frequently, ideally using both onsite (external hard drive/NAS) and offsite/cloud solutions. Ensure at least one backup is offline or air-gapped (disconnected from the network). Test backups regularly to confirm you can restore them after an incident. 7. Install Robust Security Software Use reputable antivirus and anti-ransomware tools on all endpoints. Enable real-time scanning and automatic updates. Consider endpoint detection and response (EDR) solutions for larger networks. 8. Educate and Train Employees Human error is the #1 cause of breaches. Run regular cybersecurity awareness training. Conduct phishing simulations to test and improve employee vigilance. Foster a culture where employees report suspicious activity immediately. Section 2: Detection—Spotting Ransomware Early Early detection can minimize damage. Here’s what to watch for: 1. Unusual System Behavior Sudden slowness or unresponsiveness. Files or folders that can’t be opened or have strange extensions (e.g., .locked, .crypt, .encrypted). Frequent system crashes or error messages. 2. Suspicious Network Activity Unexpected outbound traffic to unknown IP addresses. Large volumes of data being transferred, especially outside business hours. Unusual login attempts or failed logins. 3. Security Alerts Antivirus or endpoint security notifications about blocked threats. Alerts from SIEM (Security Information and Event Management) solutions or network monitoring tools. 4. Ransom Messages Pop-up windows or text files with ransom demands. Instructions to pay with cryptocurrency. Tip: Configure monitoring tools to alert you to these signs. Early action can sometimes stop the spread before it’s too late. Section 3: Response and Recovery—What to Do If You’re Hit If ransomware slips through, a calm, methodical response is vital. 1. Isolate the Infection Immediately disconnect infected devices from the network (Wi-Fi and Ethernet). Unplug external storage devices. Disable shared drives and remote access on all affected systems. 2. Assess the Damage Identify which systems and files are affected. Check backups to ensure they are clean and up-to-date. Document everything for later analysis or law enforcement. 3. Do NOT Pay the Ransom There’s no guarantee you’ll get your data back, and paying funds criminal activity. Many ransomware groups do not honor payments, and some may target you again. 4. Report the Attack Notify your IT provider, managed security service, or internal security team immediately. Report to local authorities and, if applicable, federal agencies (like the FBI’s Internet Crime Complaint Center). 5. Begin the Recovery Process Restore clean data from backups. Scan backups first to ensure they are malware-free. Rebuild affected systems from scratch if necessary. Change all passwords, especially for privileged and remote access accounts. Monitor for signs of reinfection. 6. Examine and Harden Security Analyze
How to Secure Your WordPress Website from Hackers

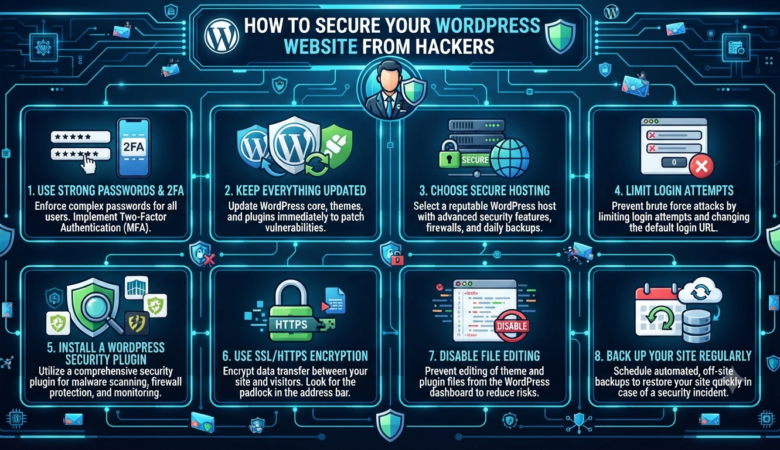
How to Secure Your WordPress Website from Hackers In today’s digital world, your website is your storefront, your reputation, and often your primary source of income. WordPress powers more than 40% of all websites, making it a favorite not only for bloggers and businesses—but also for hackers. If you think your site is too small to be a target, think again: automated bots constantly scan the web looking for vulnerable sites. But with the right steps, you can dramatically reduce your risk. This guide will show you how to secure your WordPress website from hackers, giving you the peace of mind to focus on what you do best—growing your brand and serving your audience. Why Hackers Target WordPress Sites Let’s bust a myth: hackers don’t just go after big names. In fact, small businesses and personal sites are often easier targets because they have weaker defenses. Here’s what hackers want: Data theft: Customer information, payment details, and emails can be stolen and sold. Spreading malware: Infecting your site to deliver malware to visitors and damage your reputation. SEO hijacking: Injecting links or content to boost other sites’ search rankings. Ransom: Locking your site or files and demanding payment. Botnets: Using your site’s resources for mass attacks or spam. WordPress’s popularity is its biggest strength and its biggest weakness because vulnerabilities can scale quickly. 1. Keep WordPress Core, Themes, and Plugins Updated  Why it matters: Most successful attacks exploit known vulnerabilities in outdated software. Developers constantly release patches and updates to fix security holes. How to stay safe: Enable automatic updates for minor WordPress core releases. Regularly log in and check for updates for themes and plugins. Delete unused plugins and themes—not just deactivate them. Subscribe to plugin/theme developer updates and WordPress security blogs. 2. Use Strong, Unique Passwords and Two-Factor Authentication Weak passwords are a hacker’s dream. Brute-force bots can guess “admin” and “password123” in seconds. Best practices: Use long, complex passwords with uppercase, lowercase, numbers, and symbols. Never reuse passwords between your site and other services. Use a password manager (like LastPass or Bitwarden) to generate and store secure passwords. Enable two-factor authentication (2FA) for all administrator and editor accounts using plugins such as Wordfence Login Security or Google Authenticator. 3. Limit Login Attempts and Hide Your Login Page By default, WordPress allows unlimited login attempts, making brute-force attacks easy. Defensive steps: Install a plugin like Limit Login Attempts Reloaded to restrict failed login tries. Change the default login URL from /wp-login.php or /wp-admin to something unique using WPS Hide Login. Block access to the login page from certain countries or IP addresses if your audience is local. 4. Choose Trusted Themes and Plugins Not all WordPress add-ons are created equal. Poorly coded or abandoned plugins/themes are a major vulnerability. How to choose safely: Download only from reputable sources (WordPress.org or trusted developers). Check reviews, update frequency, and active installations. Delete anything you’re not using—deactivated plugins/themes can still be exploited. Avoid “nulled” or pirated themes and plugins—they often contain hidden malware. 5. Secure Your Hosting Environment Your hosting provider is your first line of defense. Hosting security essentials: Choose a reputable host with a strong security track record. Ensure they offer features like firewalls, daily backups, SSL certificates, and malware scanning. Ask about their disaster recovery and incident response plans. Consider managed WordPress hosting for automatic updates, staging environments, and extra security layers. 6. Use HTTPS and an SSL Certificate   Why it matters: SSL encrypts data between your website and your visitors, protecting login credentials, payment info, and other sensitive data. How to implement: Most hosts offer free SSL certificates via Let’s Encrypt. Use a plugin like Really Simple SSL to force HTTPS across your site. Update Google Search Console and Analytics to the HTTPS version of your site. 7. Set Proper User Roles and Permissions Not everyone needs admin access. Limiting permissions reduces the risk of accidental or intentional changes. Steps to take: Assign users only the role they need (Subscriber, Contributor, Author, Editor, Administrator). Regularly audit and remove inactive or unnecessary accounts. Require strong passwords and 2FA for all users with elevated privileges. 8. Install a WordPress Security Plugin Security plugins add extra layers of protection—firewalls, malware scanning, login monitoring, and more. Top security plugins: Wordfence Security Sucuri Security iThemes Security Set up alerts for suspicious activity, enable brute-force protection, and run regular malware scans. 9. Regularly Backup Your Website No security is perfect. If disaster strikes, a recent backup is your lifeline. Backup tips: Use plugins like UpdraftPlus or BackupBuddy. Schedule automatic backups (daily or weekly, depending on how often you update content). Store backups offsite—in the cloud (Dropbox, Google Drive) or a secure remote server. Test your backups regularly to ensure they restore correctly. 10. Harden Core Files and Server Settings Advanced attackers often target file permissions and server configurations. How to harden: Protect your wp-config.php and .htaccess files by restricting access and moving wp-config.php one directory above the root if your host allows. Set file permissions to 644 for files and 755 for directories—never use 777. Disable file editing in the dashboard by adding define(‘DISALLOW_FILE_EDIT’, true); to your wp-config.php. Limit PHP execution in vulnerable directories (/uploads/, /wp-content/). 11. Monitor Activity and Audit Logs Keeping an eye on what’s happening under the hood helps you spot suspicious actions before they become disasters. Plugins for logging: WP Activity Log Stream Monitor: User logins and failed attempts File changes and plugin installs Settings adjustments 12. Protect Against DDoS Attacks Distributed Denial-of-Service (DDoS) attacks can overwhelm your site with fake traffic. Defensive measures: Use a CDN (Content Delivery Network) like Cloudflare or Sucuri, which offer DDoS protection and caching. Block suspicious IPs and limit XML-RPC requests if not needed. Regularly monitor server resources for unusual spikes. 13. Disable Directory Listing If directory listing is enabled, hackers can see all files in your folders—a roadmap for attacks. How to disable: Add Options -Indexes to your .htaccess file. 14. Secure Your Database Your WordPress database contains all your

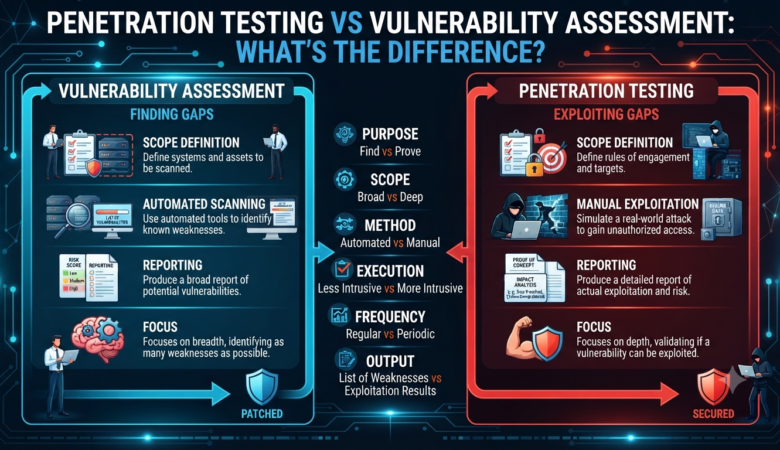
Penetration Testing vs Vulnerability Assessment: What’s the Difference?

Penetration Testing vs Vulnerability Assessment: What’s the Difference? In the ever-evolving world of cybersecurity, two terms frequently pop up in every IT professional’s vocabulary: penetration testing and vulnerability assessment. While often used interchangeably, these are distinct practices—each with its own methods, goals, and outcomes. If you’re a business owner, IT manager, or just a curious learner, understanding the difference can help you make smarter decisions about your digital security. This guide breaks down what each process involves, why both matter, and how to choose the right approach for your organization. Why Cybersecurity Testing Matters Let’s start with the basics. No system is 100% secure. In our digital world, cyber threats—from phishing and malware to insider threats and zero-day exploits—are an everyday reality. Small businesses, large enterprises, and even government agencies are all at risk. The best way to defend yourself? Know your weaknesses before attackers do. This is where vulnerability assessments and penetration tests come in, forming the backbone of proactive cybersecurity. What is a Vulnerability Assessment? Definition A vulnerability assessment is a systematic process that scans your systems, networks, or applications to identify known vulnerabilities—think of it as a “security health check.” The goal is to create a detailed list of potential weak spots that could be exploited by cybercriminals. How Does it Work? Typically, a vulnerability assessment uses automated tools to scan devices and software for: Unpatched software or outdated systems Default or weak configurations Open ports and exposed services Missing security updates Known software bugs The process ends with a comprehensive report showing what was found, often ranked by severity. Key Steps in Vulnerability Assessment Scoping: Define which systems, networks, or applications to scan. Scanning: Use automated tools (like Nessus, OpenVAS, Qualys) to search for vulnerabilities. Analysis: Review the scan results and filter out false positives. Reporting: Generate a report listing all detected vulnerabilities, their risk levels, and potential remediation steps. Example Imagine a retail company runs a vulnerability assessment and discovers that their main web server is missing several security patches, and an old FTP service is still active. The assessment would flag these as issues to be fixed. When to Use Vulnerability Assessments Regularly (monthly or quarterly) as part of routine security hygiene After major system changes or software updates To meet compliance requirements (PCI DSS, HIPAA, etc.) To quickly identify “low-hanging fruit” for attackers What is Penetration Testing? Definition A penetration test (often called a “pen test”) is a simulated cyberattack performed by security professionals (ethical hackers) to actively exploit vulnerabilities—just like a real attacker would. The goal? To see if and how an adversary could breach your defenses, compromise your data, or disrupt your operations. How Does it Work? Penetration testing is hands-on and mimics real-world hacking tactics. Testers use a combination of automated tools and manual techniques to: Identify vulnerabilities (like a vulnerability assessment) Attempt to exploit those vulnerabilities Chain multiple weaknesses together for a deeper attack Try to access sensitive data or systems Document exactly how an attacker could succeed The end result is a detailed report showing not just what’s vulnerable, but how it could actually be used against you. Key Steps in Penetration Testing Planning and Scoping: Define targets, rules of engagement, and objectives. Reconnaissance: Research and gather information about the target (OSINT, social engineering, network scanning). Scanning and Enumeration: Identify live hosts, open ports, and potential vulnerabilities. Exploitation: Attempt to break in by exploiting weaknesses (password attacks, SQL injection, etc.). Post-Exploitation: See how deep the tester can go, what data can be accessed, and how persistent access can be maintained. Reporting: Provide a narrative report with proof-of-concept screenshots, risk assessments, and concrete recommendations. Example A pen tester is hired by a healthcare company. During the test, they discover an unpatched server and use a known exploit to gain admin access. They then pivot to the database and extract a sample of patient records—demonstrating a real risk to the company. When to Use Penetration Testing Annually, or after major system changes When launching new applications or infrastructure To validate the effectiveness of security controls For compliance with high-security standards (SOC 2, ISO 27001, etc.) To train internal security teams with realistic scenarios Vulnerability Assessment vs Penetration Testing: The Key Differences Aspect Vulnerability Assessment Penetration Testing Goal Identify and list vulnerabilities Simulate real-world attacks and exploit Approach Automated scanning, minimal manual Manual, creative, hands-on Depth Broad but shallow Targeted and deep Report List of issues, ranked by severity Narrative of attack paths, proof of concept Frequency More frequent (monthly/quarterly) Less frequent (annually/bi-annually) Required expertise Lower—can be run by IT staff Higher—requires skilled security pros Risk Minimal (non-intrusive) Risk of disruptions (intrusive, but controlled) Cost Lower Higher Why Both Are Important Some organizations treat these assessments as “either/or”—but to build a resilient security program, you really need both. Vulnerability assessments are your regular checkup—quick, safe, and effective for spotting known issues. Penetration tests are your stress test—showing how real attackers could use those vulnerabilities (and others) to do harm. Together, they help you cover both breadth and depth in your defenses. Common Myths and Misconceptions “A vulnerability scan is enough—I don’t need a pen test.” While scans are great for finding basic issues, they can’t show how those issues could actually be exploited in real-world attacks. Pen testing adds context and validates your true risk. “Penetration testing is too risky for my business.” Reputable testers work within strict rules of engagement, communicate clearly, and minimize risk to your operations. The controlled risk of a pen test is nothing compared to the uncontrolled risk of a real breach. “We only need to do this once.” Both processes should be part of an ongoing security strategy. New vulnerabilities appear constantly, and your systems change over time. How to Choose the Right Approach for Your Organization Start With Your Goals and Risks Compliance needs: Some standards require both assessments and pen tests. Business type: Highly regulated or data-sensitive industries (healthcare, finance) need more rigorous testing. Budget: Vulnerability scans are less expensive; pen tests

How Malware Works and Effective Ways to Remove It

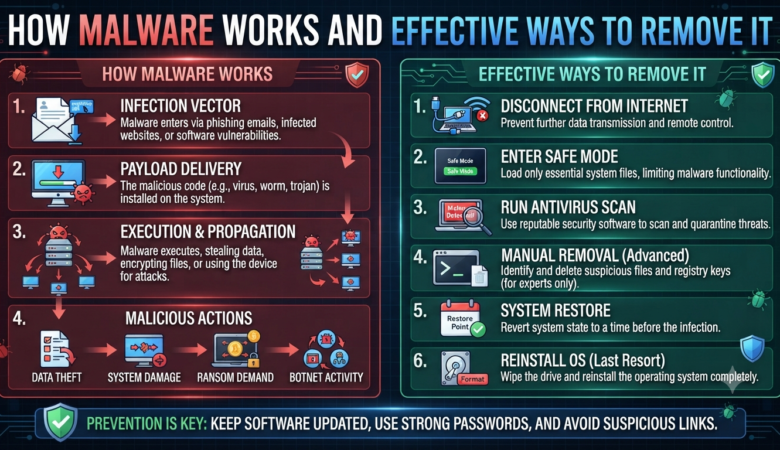
How Malware Works and Effective Ways to Remove It In our hyper-connected world, malware is one of the most persistent threats facing individuals, businesses, and organizations of all sizes. Whether it’s a virus that corrupts your files, ransomware that locks your data for ransom, or spyware quietly stealing your personal info, malware can wreak havoc in countless ways. But what exactly is malware? How does it infiltrate your system? And, most importantly, what can you do to remove it and defend your digital life? This guide breaks it all down in plain English, offering actionable steps to keep your devices—and your peace of mind—safe. What Is Malware? Malware is short for “malicious software.” It refers to any software or code designed to harm, exploit, or otherwise compromise computers, networks, or users. Some malware is obvious, disrupting your system or displaying ransom demands. Other types are stealthy, silently gathering your passwords, banking info, or tracking your browsing habits. Common Types of Malware Viruses: Attach themselves to clean files and spread when the file runs. Worms: Self-replicate and spread across networks, often without user intervention. Trojans: Disguise themselves as legitimate programs but act maliciously once installed. Ransomware: Encrypts your files and demands payment for the decryption key. Spyware: Monitors your activity and steals sensitive information. Adware: Displays unwanted ads, sometimes redirecting your browser or slowing your system. Rootkits: Hide deep within your system to evade detection and maintain control. Fileless Malware: Operates in memory, leaving few traces on disk, making it hard to detect. How Does Malware Infect Your System? Understanding how malware spreads helps you avoid infection. Here are the most common infection vectors: 1. Phishing Emails Cybercriminals often send emails that look like they’re from trusted sources. These emails may contain malicious attachments or links that, when clicked, download malware onto your device. 2. Malicious Downloads Free software, pirated programs, or even seemingly innocent browser extensions can be bundled with malware. Downloading from untrustworthy sites is a major risk. 3. Infected Websites (Drive-by Downloads) Simply visiting a compromised website—sometimes even legitimate ones—can automatically download malware to your computer if your browser or plugins aren’t up to date. 4. Removable Media USB drives, external hard drives, and SD cards can carry malware from one device to another, especially if “autorun” is enabled. 5. Exploiting Vulnerabilities Hackers target out-of-date software, operating systems, and plugins, exploiting known weaknesses to install malware. 6. Social Engineering Attackers trick you into downloading or running malicious software by posing as tech support, sending fake updates, or using urgent scare tactics. 7. Network and Wi-Fi Attacks Open or poorly secured Wi-Fi networks can be exploited to deliver malware to connected devices. What Happens When Malware Infects Your Device? The effects of a malware infection can range from annoying to catastrophic, including: Sluggish performance: Malware can hog your CPU and memory, making your device slow. Frequent crashes or errors: Files may get corrupted, or system stability can be compromised. Pop-up ads or browser redirects: Adware or spyware loves to hijack your browser. Disabled security software: Some malware tries to turn off your antivirus so it can operate undetected. Data theft or unauthorized access: Spyware and keyloggers can steal passwords, bank info, and sensitive files. Ransom demands: Ransomware locks your files and demands payment. Unusual network activity: Malware may use your device to send spam or join a botnet. Key takeaway: Not all malware announces itself. Some infections run silently in the background, causing harm without clear symptoms. How to Detect Malware on Your Device Early detection is crucial. Here’s what to watch for: Signs of Malware Infection Slow or unresponsive computer Unexpected pop-ups or ads, even when not browsing Browser homepage or search engine changes without your consent Programs you didn’t install appear on your device Security software is disabled or can’t be updated Files go missing or are encrypted Frequent crashes or system instability Friends receive suspicious emails or messages from your accounts Using Security Tools Antivirus/Anti-malware scans: Run a full system scan using up-to-date security software. Task Manager/Activity Monitor: Look for unfamiliar processes using high CPU, memory, or network. Network monitoring: Check for unusual outbound connections or high network usage. Effective Ways to Remove Malware Removing malware requires a systematic, thorough approach. Here’s a step-by-step guide: 1. Disconnect from the Internet As soon as you suspect an infection, disconnect your device. This can prevent the malware from sending out data, downloading more threats, or spreading across your network. 2. Enter Safe Mode Booting into Safe Mode limits the programs and services that run, making it harder for malware to hide or defend itself. How to enter Safe Mode: On Windows: Restart and repeatedly press F8, or use Start > Settings > Update & Security > Recovery > Advanced startup. On Mac: Restart and hold the Shift key. 3. Delete Temporary Files Clearing out temp files can remove some malware and speed up scanning. On Windows: Use Disk Cleanup or type %temp% in the Run dialog and delete files. On Mac: Use Finder to search for and clear ~/Library/Caches. 4. Run a Full Malware Scan Use a reputable antivirus or anti-malware tool to perform a full system scan. Consider using more than one tool for a “second opinion” (but don’t run two at the same time). Top malware removal tools: Malwarebytes Anti-Malware Bitdefender Antivirus Kaspersky Virus Removal Tool Windows Defender (built-in on Windows 10/11) ESET Online Scanner Follow the software’s instructions to quarantine or remove any threats it finds. 5. Remove or Disable Suspicious Programs and Extensions Uninstall unknown programs via Control Panel (Windows) or Applications (Mac). Disable or remove suspicious browser extensions or add-ons. 6. Update Your Operating System and Software After removal, update your OS, browsers, plugins, and all apps. This closes vulnerabilities that the malware might have exploited. 7. Change Your Passwords If you suspect spyware or keyloggers were involved, change your passwords from a clean device. Focus on important accounts (email, banking, cloud storage) first. 8. Restore from Backup (If Needed) If your

Network Security Best Practices for Small Businesses

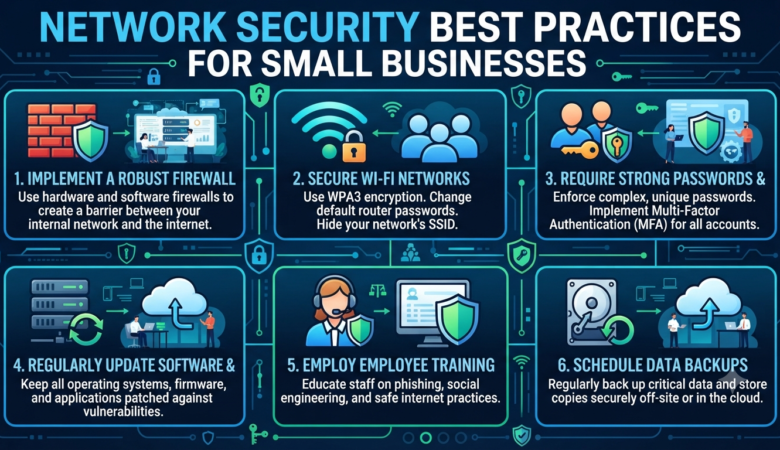
Network Security Best Practices for Small Businesses   In an era where even the smallest companies depend on digital tools and the internet, network security isn’t just a concern for big corporations. Small businesses are increasingly in the crosshairs of cybercriminals—often because they lack the resources or awareness to defend themselves. But here’s the good news: with the right knowledge and habits, you can turn your small business into a much harder target for hackers, data thieves, and scammers. This guide walks you through essential network security best practices for small businesses—explained in plain English, with real-world examples and actionable tips you can use right away. Why Network Security Matters for Small Businesses You might think your business is “too small to be noticed,” but cybercriminals don’t discriminate. In fact, smaller companies are often targeted precisely because they’re seen as easier prey. According to recent studies, over 40% of cyberattacks are aimed at small businesses, and the consequences can be devastating—ranging from financial losses and legal trouble to reputation damage and business closure. Key risks for small businesses: Ransomware attacks that lock up vital data and demand payment Phishing scams targeting employees or customers Data breaches exposing sensitive customer information Business email compromise (BEC) leading to fraudulent payments Loss of intellectual property or trade secrets Bottom line: Network security is business security. 1. Understand Your Network and Its Weak Points Before you can secure your business, you need to know what you’re protecting. Start with a basic inventory and mapping of your network. Action steps: List all devices that connect to your network (PCs, laptops, printers, smartphones, IoT devices, etc.). Identify your routers, switches, firewalls, and any cloud services in use. Note which devices handle sensitive data (finance, customer info, etc.)—these require extra protection. Tip: Simple diagrams or spreadsheets are fine for tracking your network. The key is awareness. 2. Secure Your Wi-Fi Network Many small businesses use Wi-Fi for staff, customers, or both—but an unsecured Wi-Fi network is an open door for hackers. Best practices: Change the default admin username and password on your router. Use strong encryption (WPA3 if possible, WPA2 at a minimum). Set a complex Wi-Fi password and change it regularly. Hide your network SSID (Service Set Identifier) from public view if you don’t need customers connecting. Set up a separate guest Wi-Fi network for visitors, isolated from your main business network. Pro tip: Disable WPS (Wi-Fi Protected Setup), which can be exploited by attackers. 3. Implement Strong Password Policies Weak passwords are one of the most common ways cybercriminals break into business networks. All it takes is one “password123” and your whole system could be compromised. What to do: Require complex passwords (at least 12 characters, mixing letters, numbers, and symbols). Use a password manager to generate and store unique passwords for all accounts. Require employees to change passwords regularly (every 60–90 days). Never reuse passwords across different accounts or systems. Tip for owners: Don’t forget to update passwords for network devices, cloud accounts, and remote desktop tools—not just user logins. 4. Keep All Software Up to Date Outdated software—whether it’s your operating system, office apps, or even your website plugins—can be full of holes that hackers love to exploit. How to stay safe: Enable automatic updates wherever possible. Regularly check for updates to routers, firewalls, and IoT devices. Remove unused software and plugins to reduce your “attack surface.” Remember: Updates aren’t just about new features—they often patch security vulnerabilities. 5. Use Firewalls to Guard Your Network A firewall acts as a barrier between your internal network and the outside world, controlling what traffic is allowed in and out. For small businesses: Most modern routers come with built-in firewalls—ensure it’s enabled. For extra protection, consider a dedicated hardware firewall or reputable software firewall on your devices. Review and update firewall rules to restrict unnecessary traffic. Advanced tip: Segment your network (for example, keep payment systems on a separate VLAN) so a compromise in one area doesn’t expose everything. 6. Set Up Antivirus and Anti-Malware Protection Malware is a catch-all term for harmful software like viruses, ransomware, and spyware. Even one infected device can wreak havoc on your business. What you need: Install reputable antivirus/anti-malware software on every device. Set up automatic scans and real-time protection. Regularly update virus definitions. Pro tip: Don’t rely only on the “default” antivirus—evaluate reputable options for your business needs. 7. Regular Backups: Your Safety Net No security is foolproof. If you’re hit by ransomware or suffer hardware failure, backups can mean the difference between a minor hiccup and a total disaster. Best practices: Back up vital data at least daily. Store backups offsite or in secure cloud storage. Test your backups regularly to ensure they actually work. Keep at least one backup copy offline—away from the network. 8. Educate Your Employees Your team is your first—and sometimes last—line of defense. Most cyberattacks, especially phishing, succeed because of human error. How to train staff: Teach them to recognize suspicious emails, links, and attachments. Encourage them to report anything unusual ASAP. Set clear policies for handling sensitive data and passwords. Run regular cybersecurity training sessions and test employees with simulated phishing attacks. Tip: Make security part of your company culture, not just a box to check. 9. Control Access and User Permissions Not every employee needs access to everything. Limiting permissions reduces risk if an account is compromised. Action steps: Use the principle of least privilege: give employees only the access they truly need. Remove access for former employees immediately. Require separate accounts for each staff member—never share logins. Bonus: Set up multi-factor authentication (MFA) for sensitive systems and remote access whenever possible. 10. Monitor and Log Network Activity You can’t respond to threats you don’t see. Monitoring helps you spot suspicious activity before it becomes a crisis. How to do it: Enable logging on your firewall, router, and critical systems. Consider a network monitoring tool or SIEM (Security Information and Event Management) solution—even basic, free tools can help. Regularly review